
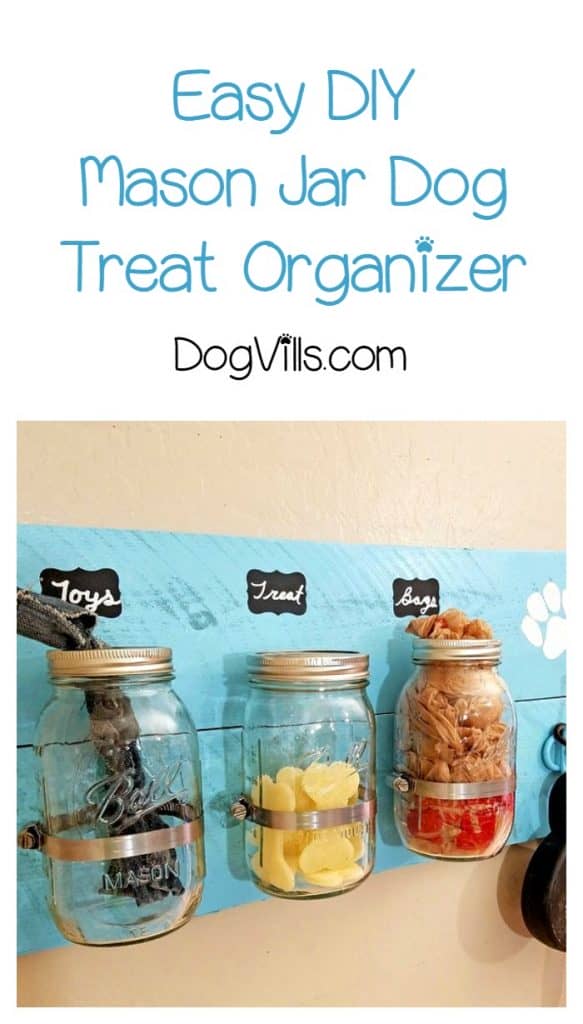
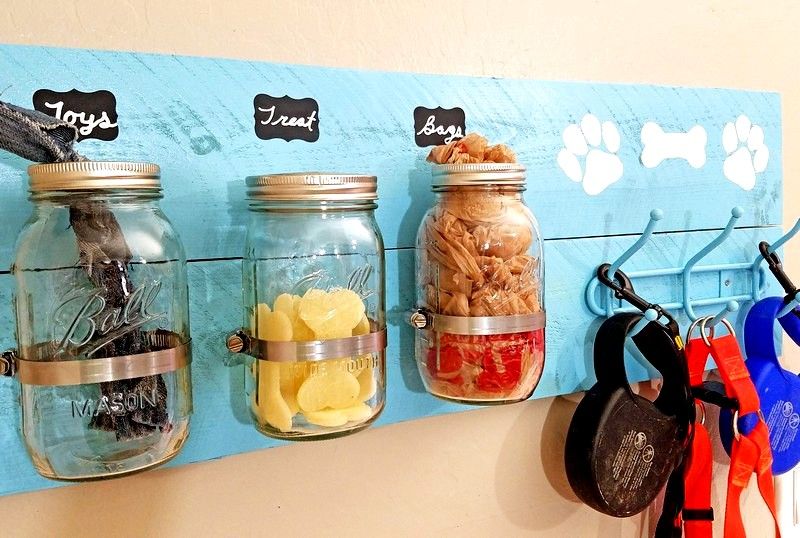
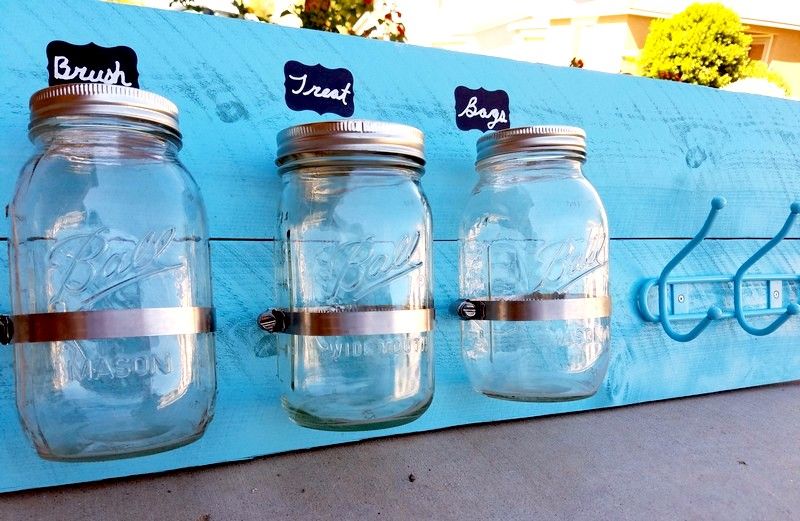
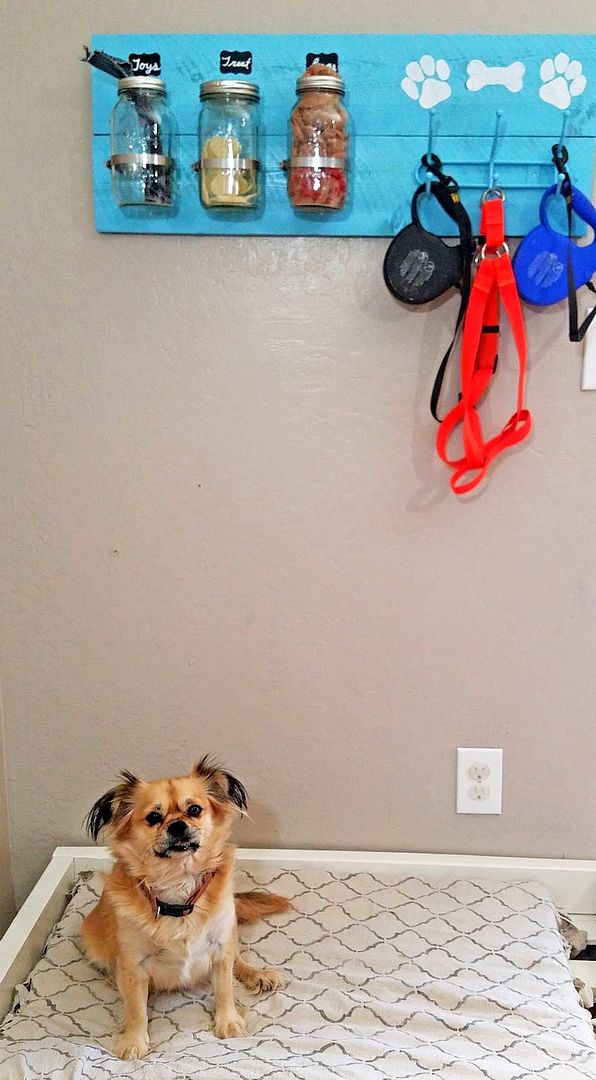
If you are looking for a quick but adorable way to organize all your essentials for walking your dogs, this mason jar dog treat organizer. It only takes 30 minutes active time to complete. The longest part is waiting for the paint to dry. Once complete you will have a place to hang your leashes and harness. We added a jar for plastic bags so that we can easily grab a few to clean up messes during our walk. There is also a jar for holding treats that do not need to be refrigerated, like our hypoallergenic chicken biscuits, and your dog’s favorite toy to play with during your walk. Check out our video tutorial, then make your own!
Mason Jar Dog Treat Organizer
Affiliate links included below.
Materials:
- 1- Fence post cut into two 30 inch pieces (substitute pallet)
- 2 – Paint sticks cut 7 ½ inches
- 9 – ½ inch screws
- 3 – Mason jars
- Coat hooks
- 3 – Hose clamps
(1/2 inch band and 3-4 inch diameter)
- Spray paint
- Hand saw
- Sander
- Drill
- Chalkboard labels
(optional)
- 1 ½ inch screws for mounting
- Plastic table cloth
- Flat head screwdriver


Directions:
- Sand two 30 inch pieces of fence post or pallet.
- Measure 7 ½ inches on your paint sticks. Use a hand saw to cut 2 pieces 7 ½ inches long. These will be used to hold fence post or pallets together.
- Line up the two pieces of the fence post. Place a paint stick on both ends of fence boards. The paint stick should cross the seam of the two fence posts.
- Use ½ screws to faster the paint sticks to the boards. The two fence posts are now held together.
- Lay out a plastic table cloth and put boards and coat hooks in the center. Paint the wood and the hooks, let dry completely before assembling.
- One dry place hooks and jars on boards to determine where you would like them. Use a pencil to mark where screws will go. Predrill holes for easier assembly.
- Use half-inch screws to attach coat hooks and hose clamps. When attacking hose clamps drill the screw through the slots into the board.
- Slip mason jars into hose clamps. Tighten the hose clamps with a flathead screwdriver.
- Apply chalkboard labels and decorate as desired.
To attach your treat organizer to the wall bolt to the wall using 1 ½ inch screws. You can also use heavy duty double sided adhesive tape. Just apply a long strip to the paint stick on the back of the holder. Press the holder to the wall for two minutes. The double sided tape is a temporary holder until you have the proper screws.
Print this project for later:
Print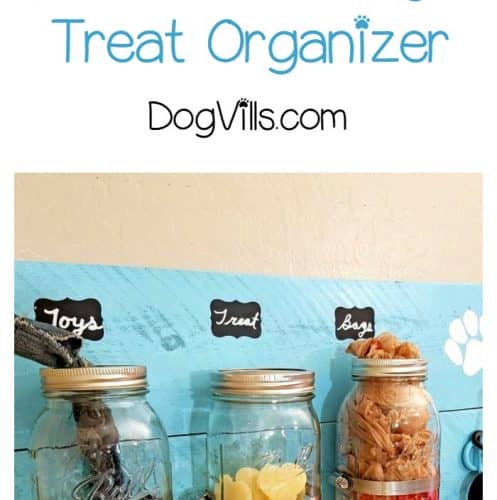
DIY Mason Jar Dog Treat & Accessories Holder
Ingredients
- 1- Fence post cut into two 30 inch pieces (substitute pallet)
- 2 – Paint sticks cut 7 ½ inches
- 9 – ½ inch screws
- 3 – Mason jars
- Coat hooks
- 3 – Hose clamps (1/2 inch band and 3-4 inch diameter)
- Spray paint
- Hand saw
- Sander
- Drill
- Chalkboard labels (optional)
- 1 ½ inch screws for mounting
- Plastic table cloth
- Flat head screwdriver
Instructions
- Sand two 30 inch pieces of fence post or pallet.
- Measure 7 ½ inches on your paint sticks. Use a hand saw to cut 2 pieces 7 ½ inches long. These will be used to hold fence post or pallets together.
- Line up the two pieces of the fence post. Place a paint stick on both ends of fence boards. The paint stick should cross the seam of the two fence posts.
- Use ½ screws to faster the paint sticks to the boards. The two fence posts are now held together.
- Lay out a plastic table cloth and put boards and coat hooks in the center. Paint the wood and the hooks, let dry completely before assembling.
- One dry place hooks and jars on boards to determine where you would like them. Use a pencil to mark where screws will go. Predrill holes for easier assembly.
- Use half-inch screws to attach coat hooks and hose clamps. When attacking hose clamps drill the screw through the slots into the board.
- Slip mason jars into hose clamps. Tighten the hose clamps with a flathead screwdriver.
- Apply chalkboard labels and decorate as desired.
Here are a few tips for making this mason jar dog treat organizer:
- If you decide to use fence posts instead of pallets, ask your hardware store to cut the board to size for you.
- Predrill your holes. It makes placing your hooks and jars a million times easier.
- Bolt the holder to you wall using 1 ½ inch screw. Screw straight through the board into your wall. You’ll get a rustic feel, and the organizer will be secure. The last thing you want is it to fall off your wall and shatter.
I’d love to see how you customize your mason jar dog treat organizer, share your pictures in the comments.


