
Today I’m going to show you how to make an easy and clever homemade dog food stand with a video tutorial.
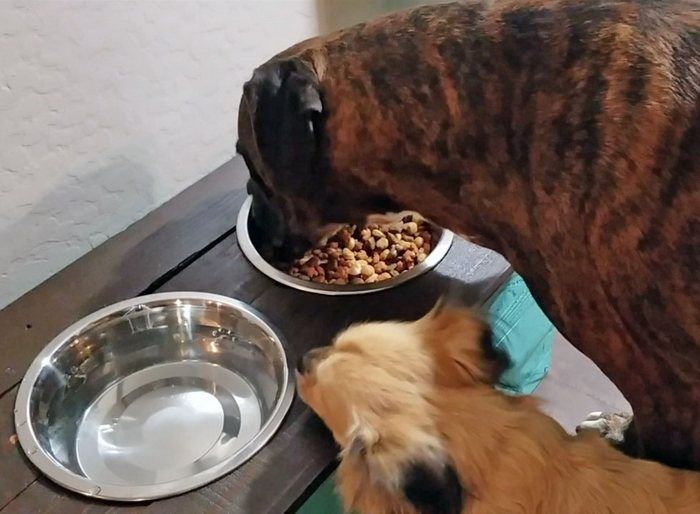
You’re really going to like it! I love keeping my pet’s food and water off the ground.
Not only does my boxer have a tendency to tip over his water bowl, but when all the dishes are on the ground my dogs tend to switch bowls.
They are like annoying siblings where they want what the other one has.
We’ve used store-bought dish stands before, but their durability is no match for our boxer. He is an enthusiastic eater. Not to mention, they can get expensive. So, instead of buying another stand, I made one using pallets.
Check out the video tutorial, then read on for a printable instructions card!
Related: Best Metal Dog Food containers.
Homemade Dog Food Stand
Affiliate links included below. Thanks for your support!
This one is for our boxer because it is tall, however, it could be easily adjusted in height for a small dog. See the note in instructions for how to adjust it to work with small pets. When working with pallets I never suggest taking apart the whole pallet unless absolutely necessary. Taking apart a pallet is a lot of hard work. Instead, use you saw to cut the board where the 2×4 hold them together. Once you have the boards removed, trim them to size and sand them. Prepping before trying to make this homemade dog food stand will make the project so much easier. I was lucky enough to find pallets that were really clean. However, as you can see one of the pallets was not as new as the other ones. That is why I have one board that is dark brown. I made this board part of the lid since the lid was going to be stained walnut.

I always use gel stain when staining wood because it is fool proof. You seriously just wipe it on and then wipe it off. To seal the lid, I used a polyacrylic sealant. I chose polyacrylic because it has a low odor, dries pretty quick, and I’ve had a wonderful experience with it in past projects. Letting the finishes dry was the longest step in this project. However, if you let the finishes dry completely, they will last a lot longer. Trust, me I have learned from experience. Always let our finishes dry.

Materials needed:
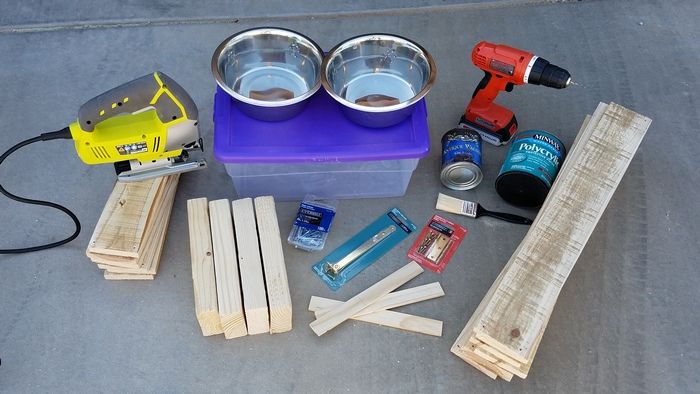
- 3 pallets cut (10 – 24 inch cuts, 6 – 12 inch cuts)
- 2 stainless steel dog dishes
(quart size)
- Storage container
- Antique walnut gel stain
- Rag or cloth for stain
- Polycrylic sealant
- Paint brush
- 2 – 2 ½ inch hinges
- 1 ¼ inch wood screws
- ½ inch screws
- 3 paint sticks cut 8 inches
- Circular Sander
- Drill
- Jig saw
- Carpenters triangle
- 1 – 2×4 cut
- 4 – cut 6 inches
- Paint
- Locking hinge for box (optional)
- Small and large drill bit
- Plastic gloves


Directions:
- Cut pallet boards to size and sand.
- Pre-drill holes in 12-inch pallet boards and 6-24 inch pallet boards. Each board will have 4 holes, 2 on each end. This prevents the boards from cracking when screwed.
- Next, you will assemble the small sides of the box. Line up 2 pieces of the 2×4, place 3 – 12-inch boards across the 2×4. Adjust until the edges of each board are even. Screw into place with 1 ½ inch screws. Repeat this step with the remaining 2×4 pieces.
- To attach the long sides of the box, prop up assembled short sides using the storage container. Place 3 24 inch boards across the sides. Adjust so that edges are flush. Screw into place. Next, flip the box over and repeat this step on the other side. You now have 4 sides of the box.
- To make the lid, line up the remaining 4 pieces of 24-inch pallet. Place paint sticks across the lid and screw into place so that 4 pallet boards are attached. You should have one stick in the middle and another stick at each side. You will need 4 – ½ inch screws to attach each paint stick.
- Next, you will need to cut out the holes for the dishes. Place the bowls on the bottom side of the lid between the paint sticks. Use a pencil to trace the shape of each dish. You will need to cut the circles ¼ inch smaller than the outline. To do this use you carpenter’s triangle to help you mark ¼ inch around the inside of the circle. Connect the marks. This is the circle you will cut out.
- Using a large drill bit, drill 4 holes inside the circle just inside your cut line. When done, insert the jigsaw blade into the hole and cut out each circle.
- Now you need to attach the lid to the box. Screw the hinges to the bottom side of the lid. Place the lid on the box, and attach hinges to the box.
- To stain the lid, you will want to put on some gloves. Shake the gel stain, then open the container and dip the rag into the stain. Rup it over the lid and the edges of the lid. When you are done, use a separate rag or towel to wipe of excess stain. Let dry for at least 2 hours.
- When the stain is dry, you will need to seal the lid to prevent warping. Spread polycyclic sealant over lid using a paint brush. If will go on a light blue color. However, it will turn clear as it dries. Apply 2 coats, and let dry 24 hours before using.
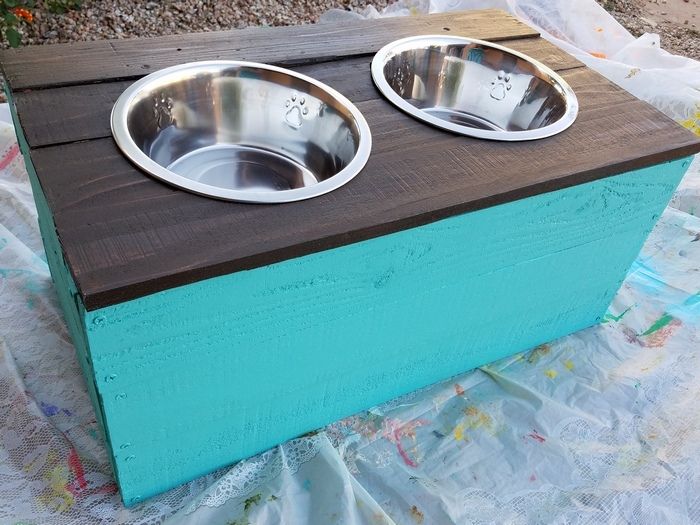
- Next, paint the base of the dog dish stand. The paint will protect the wood from warping, so you do not need to seal the painted wood.
- Once dry, insert storage container into the stand and fill with food. Place dishes in holes. Fill with water and food.
Print for later
PrintDIY Homemade Dog Food Stand Made from Pallets [with video tutorial]
Ingredients
- 3 pallets cut (10 – <g class="gr_ gr_881 gr-alert gr_spell gr_run_anim ContextualSpelling multiReplace" id="881" data-gr-id="881">24 inch cuts, 6 – <g class="gr_ gr_882 gr-alert gr_spell gr_run_anim ContextualSpelling multiReplace" id="882" data-gr-id="882">12 inch cuts)
- 2 stainless steel dog dishes (quart size)
- Storage container
- Antique walnut gel stain
- Rag or cloth for stain
- Polycrylic sealant
- Paint brush
- 2 – 2 ½ inch hinges
- 1 ¼ inch wood screws
- ½ inch screws
- 3 paint sticks cut 8 inches
- Circular sander
- Drill
Jig saw - Carpenters triangle
- 1 – 2×4 cut
- 4 – cut 6 inches
- Paint
- Locking hinge for box (optional)
- Small and large drill bit
- Plastic gloves
Instructions
- Cut pallet boards to size and sand.
- Pre-drill holes in 12-inch pallet boards and 6-24 inch pallet boards. Each board will have 4 holes, 2 on each end. This prevents the boards from cracking when screwed.
- Next, you will assemble the small sides of the box. Line up 2 pieces of the 2×4, place 3 – 12-inch boards across the 2×4. Adjust until the edges of each board are even. Screw into place with 1 ½ inch screws. Repeat this step with the remaining 2×4 pieces.
- To attach the long sides of the box, prop up assembled short sides using the storage container. Place 3 24 inch boards across the sides. Adjust so that edges are flush. Screw into place. Next, flip the box over and repeat this step on the other side. You now have 4 sides of the box.
- To make the lid, line up the remaining 4 pieces of the 24-inch pallet. Place paint sticks across the lid and screw into place so that 4 pallet boards are attached. You should have one stick in the middle and another stick at each side. You will need 4 – ½ inch screws to attach each paint stick.
- Next, you will need to cut out the holes for the dishes. Place the bowls on the bottom side of the lid between the paint sticks. Use a pencil to trace the shape of each dish. You will need to cut the circles ¼ inch smaller than the outline. To do this use you carpenter’s triangle to help you mark ¼ inch around the inside of the circle. Connect the marks. This is the circle you will cut out.
- Using a large drill bit, drill 4 holes inside the circle just inside your cut line. When done, insert the jigsaw blade into the hole and cut out each circle.
- Now you need to attach the lid to the box. Screw the hinges to the bottom side of the lid. Place the lid on the box, and attach hinges to the box.
- To stain the lid, you will want to put on some gloves. Shake the gel stain, then open the container and dip the rag into the stain. Rup it over the lid and the edges of the lid. When you are done, use a separate rag or towel to wipe of excess stain. Let dry for at least 2 hours.
- When the stain is dry, you will need to seal the lid to prevent warping. Spread polycyclic sealant over lid using a paint brush. If will go on a light blue color. However, it will turn clear as it dries. Apply 2 coats, and let dry 24 hours before using.
- Next, paint the base of the dog dish stand. The paint will protect the wood from warping, so you do not need to seal the painted wood.
- Once dry, insert storage container into the stand and fill with food. Place dishes in holes. Fill with water and food.
Note: This stand is meant for large dogs. For small dogs, I would make the stand 2 boards high instead of 3. You would cut the 2×4 to about 5-6 inches, but the rest of the measurements would stay the same.
It takes a little work, but when you’re done you have a one-of-a-kind homemade dog food stand that looks beautiful in your home!


