The holiday season is just around the corner, and you know what that means – it’s time to indulge in some festive cheer with our furry friends. Today, we’re sharing one of our favorite Holiday Dog Treats: Christmas Tree Cookies!
So, grab your Santa hat, get your four-legged companion by your side, and let’s explore how to treat your dog to some Christmas tree-shaped goodies that will have their tails wagging with joy.
Other yummy holiday treats: Candy Cane Dog treat
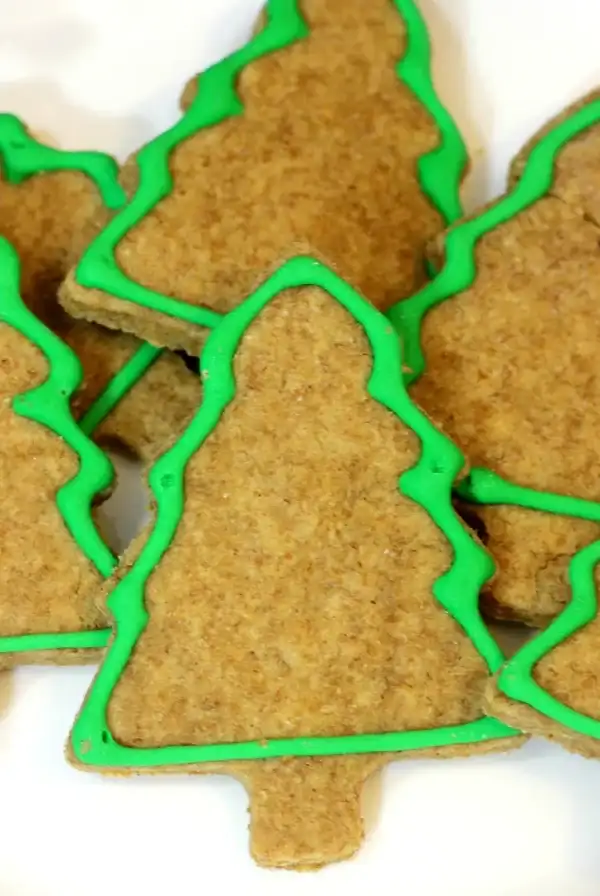
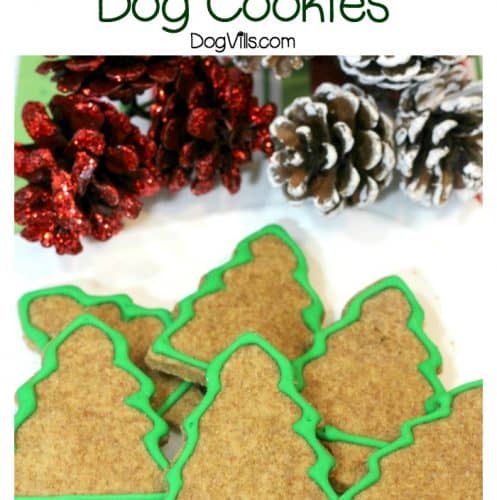
Homemade Holiday Dog Treats: Christmas Trees
These Christmas Tree treats aren’t quite as hypoallergenic as our Candy Cane Cookies, but if your dog tolerates wheat and dairy (they’re egg-free, though), they’re a fun way to include Fido in the festivities! They also make a cute gift idea for dog-loving friends! Let’s see how to make these cute holiday dog treats! Make sure to print the recipe card listed below.
Head’s up: This post contains affiliate links where we recommended ingredients. We earn a commission if you make a purchase through them at no extra cost to you.
Ingredients:
- 2 C wheat flour
- 1/2 tsp baking powder
- 1/2 C creamy peanut butter
- 1 C skim milk
Icing Ingredients:
- 1 1/2 tsp meringue powder
- 1/2 C powdered sugar
- 3-4 TBSP warm water
- Green & red gel natural food coloring
Cookie Cutter:

Directions:
- Preheat oven to 350 degrees
- Combine flour and baking powder in a bowl.
- Whisk together the milk and creamy peanut butter.
- Add flour mixture a little at a time.
- Mix until fully incorporated.
- Toss some wheat flour on a cutting board.
- Roll out dough with a wheat flour-covered rolling pin.
- Roll out the dough and using the Christmas Tree cookie cutter, cut out the doggie treats.
- Transfer the Christmas Tree to a parchment lined cookie sheet.
- Bake at 350 degrees for 8 minutes.
- Allow to cool completely on the cookie sheet.
Icing Directions:
- Combine all ingredients (not food coloring) into a bowl.
- Beat with an electric mixing until icing can hold a stiff peak.
- Divide the icing into two bowls.
- In bowl #,1 adds several drops of green gel food coloring, stirring well.
- In bowl #2 several drops of red gel food coloring, stirring well.
- Spoon the green icing into a frosting bag with #2 tip.
- Twist the open end of the frosting bag to push the icing to the tip.
- Outline the Christmas tree with the green icing.
- Allow the outlining to dry for about 30 seconds.
- Spoon the red icing into another frosting bag with a #2 tip.
- Twist the open end of the frosting bag to push the red icing to the tip.
- Add small red dots to the tree for decorations.
- Allow to dry for about 1 hour. Check to see if the icing is dry.
Aren’t they adorable? You’ll have to remind your guests that these are Spot’s special snacks; they look good enough for humans to eat!
I suppose you could if you wanted to! There’s nothing in them that would be harmful to you; they just might be a little on the bland side for your taste buds.
Your pup will gobble them right up though!
Optional Add-Ins and Ingredient Swaps for These Homemade Christmas Dog Treats
While these homemade dog treats are perfect as is, there are plenty of fun ways to spice them up a bit (literally and figuratively).
Some add-ins include:
- Cinnamon
- Ginger (for more of a gingerbread cookies flavor)
- Mashes Sweet Potatoes
- Apples (for an added fiber boost, either mashed up or finely chopped)
- Fresh cranberries
- Rolled oats
- Pumpkin puree
- Unsweetened apple sauce
Ingredient swaps:
- Oat flour, almond meal, brown rice flour or coconut flour instead of whole wheat flour
- Honey instead of powdered sugar (you’ll need to play with the amount and maybe add in more meringue powder to get the right consistency)
- Coconut oil in place of part of the peanut butter

For more great ideas, check out 11 of the Easiest & Tastiest Homemade Dog Treat Recipes!
Do you make any special holiday dog treats? Tell us about them in the comments!
PRINT THIS CHRISTMAS COOKIES DOG TREATS RECIPE FOR LATER:
Print
Holiday Dog Treats Recipe: Christmas Trees
5 Stars 4 Stars 3 Stars 2 Stars 1 Star
No reviews
Holiday Dog Treats Recipe: Christmas Trees
- Total Time: 23 mins
- Yield: 12
Ingredients
- 2 C wheat flour
- 1/2 tsp baking powder
- 1/2 C creamy peanut butter
- 1 C skim milk
- Icing Ingredients:
- 1 1/2 tsp meringue powder
- 1/2 C powdered sugar
- 3-4 TBSP warm water
- Green & red gel food coloring
Instructions
- Preheat oven to 350 degrees
- -Combine flour and baking powder in a bowl.
- -Whisk together the milk and creamy peanut butter.
- -Add flour mixture a little at a time.
- -Mix until fully incorporated.
- -Toss some wheat flour on a cutting board.
- -Roll out dough with a wheat flour-covered rolling pin.
- -Roll out the dough and using the Christmas Tree cookie cutter, cut out the doggie treats.
- -Transfer the Christmas Tree to a parchment lined cookie sheet.
- -Bake at 350 degrees for 8 minutes.
- -Allow to cool completely on the cookie sheet.
- Icing Directions:
- -Combine all ingredients (not food coloring) into a bowl.
- -Beat with an electric mixing until icing can hold a stiff peak.
- -Divide the icing into two bowls.
- -In bowl #,1 adds several drops of green gel food coloring, stirring well.
- -In bowl #2 several drops of red gel food coloring, stirring well.
- -Spoon the green icing into a frosting bag with #2 tip.
- -Twist the open end of the frosting bag to push the icing to the tip.
- Outline the Christmas tree with the green icing.
- -Allow the outlining to dry for about 30 seconds.
- -Spoon the red icing into another frosting bag with a #2 tip.
- -Twist the open end of the frosting bag to push the red icing to the tip.
- -Add small red dots to the tree for decorations.
- -Allow to dry for about 1 hour. Check to see if the icing is dry.
- Prep Time: 15 mins
- Cook Time: 8 mins
Author
-

Hi there! I'm Nicole, the editor-in-chief and one of the writers here at DogVills. I've been a dog owner for most of my adult life and a dog lover for much longer than that. I grew up with a wonderful German Shepherd named Jake, who I loved SO much that I named my son after him. When I'm not writing for DogVills or my own site, Pretty Opinionated, I love spending time with my teenager (when he actually lets me) and my Pharaoh Hound, Freya. I'm also an avid reader AND a total TV fanatic.
View all posts


